This post contains affiliate links, meaning I get a commission if you decide to make a purchase through my links, at no extra cost to you. Please read my disclosure and privacy policy & terms for more info.
Helloooooo spring!
It’s time to break out the camper and get it ready for some great adventures this camping season!
After being winterized and stored throughout the cold months, you’ll need to set some time aside to dewinterize and conduct a few maintenance checks to ensure your RV is in good working order, safe, and reliable for the road.
Now is also a good time to schedule yearly inspections recommended by your motorhome manufacturer.

Follow the checklist below to prepare your travel trailer or motorhome for the season.
It is important that you refer back to your owner’s manual for unit-specific guidelines.
Do you have all the boxes checked off your RV Spring Season Checklist?
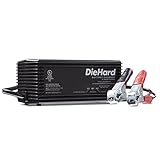
1. Reinstall batteries (if removed) and check them over for cracks and corrosion. Since there are different types of RV batteries, it’s important to check with the manufacturer for proper maintenance.
It’s best to routinely check RV batteries and charge them throughout the winter. A battery charger and maintainer, like DieHard or Duracell, maintains batteries while preventing overcharging.
2.Flush out antifreeze. Whether you winterized the rig or had a company come out and winterize it for you, it now has to be dewinterized. The non-toxic RV antifreeze, often used when winterizing, needs to be drained out completely prior to use.
To do so, connect your water hose to a water supply. Make sure to flip the tank valve to city water supply. (Remember, both the fresh water tank and water heater were drained and bypassed during winterization and should still be bypassed– most importantly, the water heater.) Flipping to city water supply is going to bypass the fresh water holding tank and push water from the spigot directly through the pipes that lead to the faucets, shower and toilet. Turn on all faucets using both hot and cold settings and flush until the water runs clear. If you have other water appliances, such as a washing machine and/or refrigerator water dispenser, you’ll need to clear the lines of antifreeze as well. Run a washing machine cycle before using and depress the refrigerator water dispenser into a container until it is clear. Allow the ice maker to run through multiple cycles and throw out any ice with antifreeze.
3.Sanitize the water system. After the antifreeze is flushed out, you’ll now need to sanitize the freshwater system for safe and sanitary water. Due to the RV sitting for months, the system should be cleaned of any mold, mildew, and bacteria.
Using a mixture of ¼ cup of household bleach per 15 gallons, as determined by your tank capacity, you can either siphon this mixture from a bucket into the tank or put it into the filter housing. (Remember, your water heater should still be turned off and bypassed.) Your holding tanks should also be empty before starting this process.
If using the filter housing method, unscrew the filter housing and remove the filter. Pour the correct amount of bleach in and fill up the fresh water tank. With the full tank, turn the water pump on and pull the bleach water from the tank pumping through all of the plumbing lines. Turn on faucets and run both hot and cold settings until you smell bleach. Repeat this for all faucets, shower, toilet, refrigerator, etc. to ensure the sanitizing mixture has gotten through the plumbing lines. Let the bleach water sit in the system for a minimum of four hours. For best results, let it sit overnight or up to 12 hours. After the allotted time, drain the fresh water tank using the drain valve, fill with clean potable water and run water out of each faucet on both hot and cold settings until the bleach smell is no longer evident. Once flushed, replace filters.

As an alternative method, Thetford makes an all-in-one kit for sanitizing.

For your first camping trip, don’t forget to also replace your Camco TastePURE RV Inline Water Filter. This can be attached inline between the water source and RV to filter all of the water going into the unit for safer, cleaner water.

4.Fill the water heater. Redirect water into the water heater. Make sure it has water in it first before turning on so that you don’t burn up the element.
5.Maintain the holding tanks & system. Check the waste tank valves, sewer connections, fittings, seals, and dump hoses. Inspect for bad seals, cracks, and leaks. Often the new season is a great time to purchase a new sewer hose! Additionally, treat the black tank.

6.Inflate tires. Check air pressure and inflate to proper PSI. While doing so, inspect for signs of wear, worn tread, dry rot, and cracks. Don’t forget to inflate and check the spare.

7.Check safety devices and make sure the smoke detector, LP detector, and carbon monoxide detectors are in working order. Test and replace batteries if necessary. Inspect fire extinguishers’ pressure gauge or inspection tag and replace if the pressure is inadequate, expired, or damaged.
8.Refill propane and place tanks back on the mount (if removable). Connect and check for leaks. Be aware of smells and use a Portable Gas Sniffer or an approved LP leak solution like Camco’s Gas Leak Detector Spray to check for bubbles forming– which are signs of a leak.

9.Maintain shoreline power cords. Inspect the electrical cords for any damage, such as: cracks, gouges, or cuts. Make sure the plug connects to the cord securely. Check the plug prongs for bent or loose prongs. Replace the power cord if needed with the service your unit requires– 30 amp or 50 amp.

10. Operate appliances. If you can hook up to 30 amp or 50 amp power, it’s ideal to go over appliances for proper operation. For example, check that the refrigerator is cooling and getting down to temperature. Turn the ACs on and make sure they are cooling as they should. Turn the water heater on to propane or electric (make sure there is water in it) to ensure the water is heating up correctly for hot showers and run the furnace.
11.Service AC units and clean the ducted air conditioner filters. It is important to inspect or have the AC units inspected to make sure they are working efficiently. It may be wise to schedule AC maintenance before the hot weather hits!
12.Check the engine (motorhome). Fluid levels, including: engine oil, transmission fluid, coolant, power steering fluid, brake fluid, and windshield washer solvent, should be checked and filled, if needed.
13.Inspect the generator and clean it of leaves and debris. Check if oil needs to be replaced.
14.Work the jacks and levelers. Check for hydraulic leaks (if applicable), inspect levelers, connections and hydraulic lines, and test.

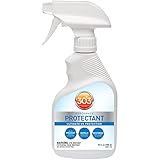
15.Inspect slide-outs for proper seals. Look over the slide seal and covers for damage or debris. Make sure the slides are in good working order by extending them and applying a UV inhibitor such as 303 Protectant.
16.Extend the awning to ensure it’s intact and the mechanism is operating properly. Inspect for debris, tears, and mildew.

17.Put out the exterior steps and lubricate hinges if needed. Ensure the steps retract all of the way.
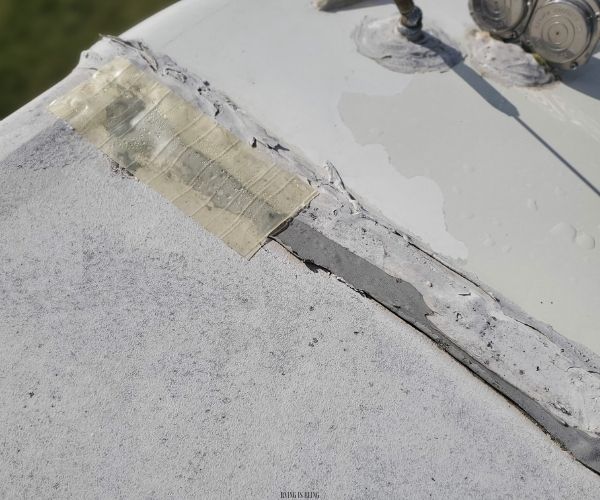
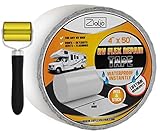
18.Inspect the roof condition and examine roof vents, edges, and corners; inspect sealant and look for cracks, gaps, broken seams, gouges, and scratches from branches. Reseal areas in need and depending on severity of winter wear, it may be time to look into further roof repair or replacement.

19.Reseal components. Inspect all door and window seals. Check RV seams on side panels. Likewise, examine the toilet and shower area and reseal where necessary.

20.Check lights and turn signals. Take a look at the headlight covers and replace the lens for cracks or damage. Make sure they all are working.
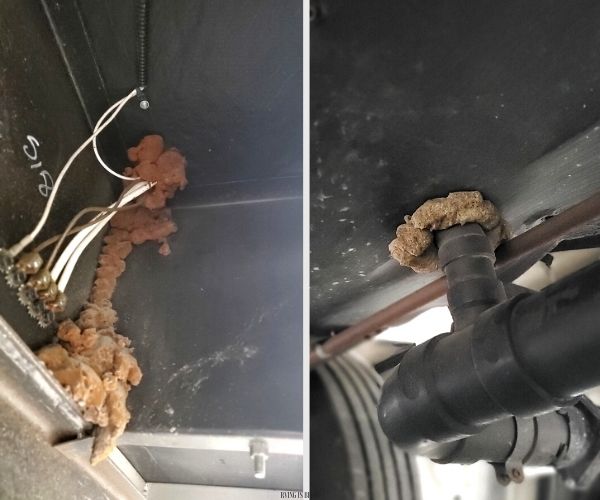
21.Look at the underbelly and storage areas for debris, leaks, or evidence of critters. Block or patch any entry points to keep mice out of your RV.
Time to CLEAN!!
See how I clean our motorhome interior for the camping season!
RVING IS BEING prepared for the camping season!