This post contains affiliate links, meaning I get a commission if you decide to make a purchase through my links, at no extra cost to you. Please read my disclosure and privacy & terms for more info.
N
ew to RVing or not, checklists help start vacation in the right direction.
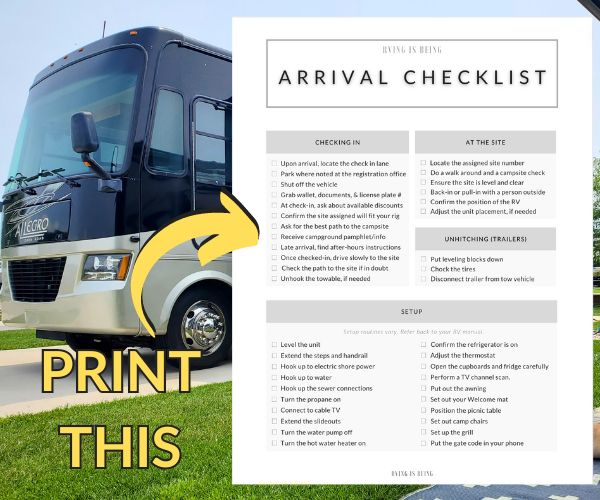
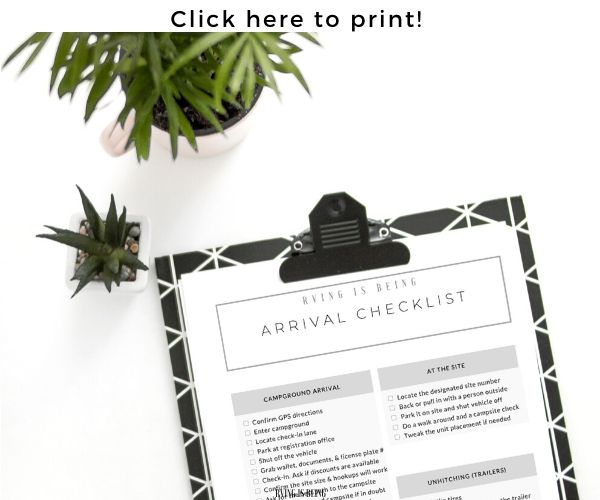
Follow our RV arrival and setup steps for a smooth entrance and safe setup process at the campsite!
RV Arrival and Setup Checklist
Checking In
1. Before arriving, first confirm that the GPS directions are correct and big rig accessible, if need be. Take a look at the route and view the campground entrance on the Google Maps app so that you know exactly what to watch for.
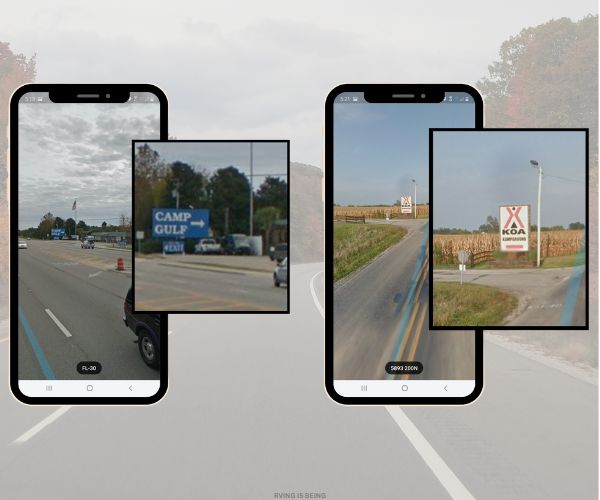
2. Arrive at the campground.
3. Slowly maneuver into the Check-In lane while not blocking other lanes. Stop where noted at the registration area.
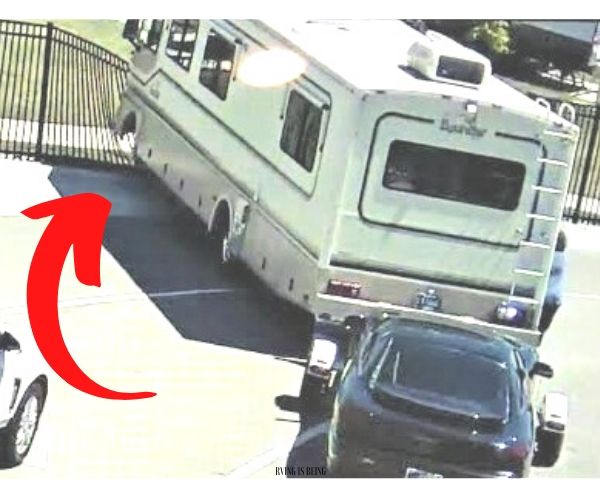
4. Throw ‘er in park and shut off the vehicle. DO NOT leave your motorhome running during the short check-in process. It can roll if the brake is not pulled or if a pet jumps on the driver’s seat and bumps it (like below). Park and shut it off!
5. Grab your wallet, confirmation documents, dog records, and snap a picture of the license plate on the way into the office.
6. At check-in, ask about available discounts such as Military, Good Sam, First Responder or any other camping club discount.
7. Verify that the site assigned will fit your rig and requirements (correct amperage, water, sewer, etc.)
8. If you have a large RV, ask if the route to the campsite is big rig accessible or what’s the best way to get there. If you’re unfamiliar with the campground or are arriving late at night, it’s not a bad idea to scout out the path and site you are assigned. Remember, it’s so much harder to turn around or back up if you get stuck down too sharp or narrow of a path! If in doubt, scout it out!
9. Ask if the campground has an area to unhook your tow vehicle.
10. If the campground does not offer full hookup, determine where the dump station and fresh water fill is to visit on your way to the site.
11. Receive your check-in pamphlet with directions to the site, campground information, gate codes, rules and regulations, and Wi-Fi password.
12. If arriving after the office is closed, look for after-hours check-in instructions.
13. Slowly drive to your designated campsite as noted on the park map.
14. If you have a toad (tow vehicle) unhook it at the designated unhook/hookup area.
At the Site
15. Locate your assigned site number.
16. Before driving into the site, take a quick look to ensure the site is level and that trees, limbs, picnic tables, fences, etc. are far enough away from the roof, exterior, and slideouts. Also, doing a campsite check is best to do now, to make certain the site accommodates your RV and works for you and your family– rather than get parked, set up, and THEN have to switch sites. Look for anything that could be a potential issue during your stay. Are there overhanging limbs that could damage your roof? Is it built for rain runoff so after a hard rain your rig won’t get stuck? Is it too unlevel? Etc.
17. Back-in or pull-in accordingly. It always helps with an extra pair of eyes outside the RV.
18. Once parked onsite, do a walk around to confirm the position of the RV is in reach of the hookups (water, sewer, and shore power) and that the unit is clear of limbs and obstructions even after the slides, satellite and awning are extended. Be sure to put it in park or pull the air brake before jumping out to check. Better yet, turn the motorhome off. (Can’t stress this part enough for motorhomes! We’ve seen multiple incidents where drivers’ failed to pull the air brake, and their motorhome started rolling off!)
19. Adjust the trailer or motorhome placement if needed.
Unhitching (trailers)
20. Put leveling blocks down and chock the tires.
21. Disconnect the trailer from the tow vehicle.
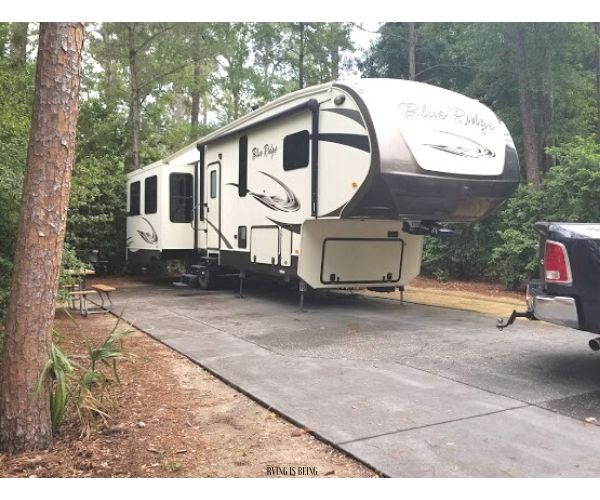
Setup
Setup procedures will be different as dependent on your make and model. For example, our motorhome manufacturer states to deploy the slideouts first, then level, so that it doesn’t twist the full wall slide. However, others level first and then put the slides out. Likewise, trailer unhitching and leveling procedures vary between units. At the same time, some RV owners prefer to hookup to electric, sewer, and water first, before they put their slides out– not only increasing voltage for better slideout operation but also preventing them from ducking under and nailing their head on the slide! OUCH! Either way, carry out a routine you find suitable as well as refer back to your RV manual for correct setup steps.
22. Level the unit manually or with an automatic leveling system.
23. Extend the steps and handrail.
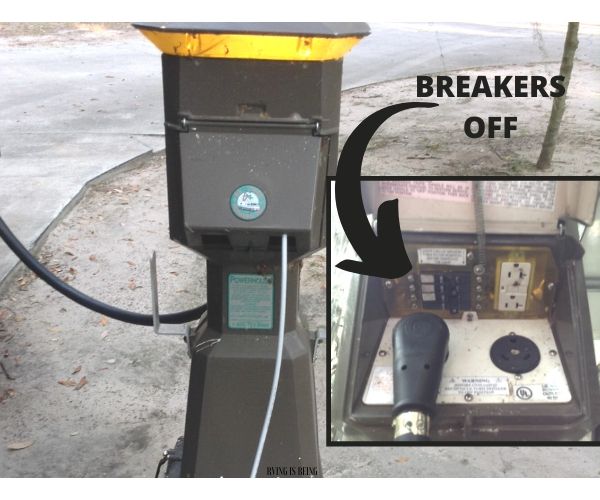
24. Connect to electric shore power. First, make sure that the breaker is off. Connect electric to the camper then plug into the shore power receptacle. Remember a surge protector! Then, flip the breaker back on.
25. Connect to water with your fresh water drinking hose. Don’t forget a water pressure regulator!
26. Connect the sewer hose between the RV and the campground sewer inlet.
27. Turn the propane on.
28. Connect to cable TV (if available).
29. Extend the slideouts.
30. Turn the water pump off.
31. Turn the hot water heater on.
32. Confirm the refrigerator is on (and running on electric).
33. Adjust the thermostat.
34. Open the cupboards and fridge carefully for fallen objects during travel.
35. Turn on and raise the TV antenna or satellite dish if you have one. Run your channel program.
36. Put out the awning.
Personalize Your Site!
- Plop down your welcome mat.
- Position the picnic table to your liking.
- Get out the camp chairs.
- Set up the grill.
- Remove your bikes from the rack. (Be sure to lock them up when you’re not at the campsite!)
Tip: Before you head out and have some fun, grab the campground pamphlet and snap a picture of the map, phone number, address, and gate code. Although the pamphlets are very helpful, they often get left behind in the camper when out and about. Odds are your phone will always be with you so you’ll have the info when needed!
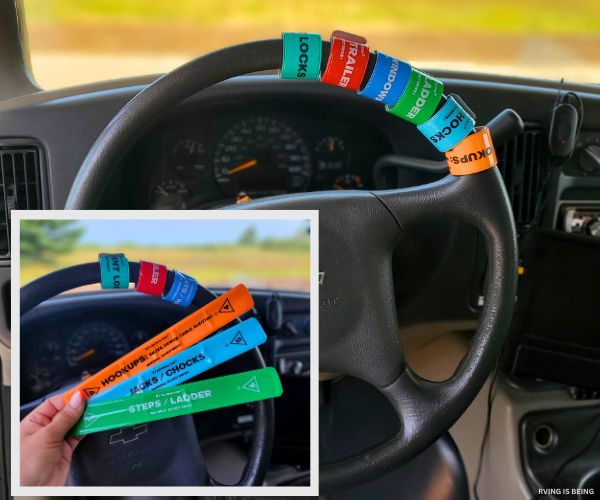
Help prevent costly mistakes with RVminders! Slap against the steering wheel to remind you of important step-by-step arrival or departure tasks.
Be sure to check out the RV Tear Down and Departure Checklist!
RVING IS BEING setup and ready for some fun!
Related posts
Today's pick
Hot topics
Disclosure: This website contains affiliate links, meaning we will get a commission if you decide to make a purchase through the links, at no additional cost to you. Additionally, this website is an Amazon Associate. As an Amazon Associate, the owner of this website earns a commission as a result of certain qualifying purchases. CERTAIN CONTENT THAT APPEARS ON THE SITE TO WHICH THIS SITE LINKS ARE AFFILIATE LINKS. THIS LINKED CONTENT IS PROVIDED “AS IS” AND IS SUBJECT TO CHANGE OR REMOVAL ANY TIME. Please read this Site’s disclosure and privacy policy & terms for more information.
Categories
- Children & Family (15)
- Cookout Gear & Accessories (6)
- Food (2)
- Guide (37)
- Health (5)
- Holidays (10)
- List (10)
- Maintenance & Repair (10)
- Printables (4)
- Products & Accessories (40)
- Quote (3)
- RV & Campsite Setup (23)
- RVING (78)
- Shop Page (36)
- Storage & Organization (2)
- Tech (4)
- Travel (22)

