This post contains affiliate links, meaning I get a commission if you decide to make a purchase through my links, at no extra cost to you. Please read my disclosure and privacy & terms for more info.
Is your RV ready for winter?
After another camping season on the books, you’ll want to take some time to prepare and protect your hard earned investment for the winter months.
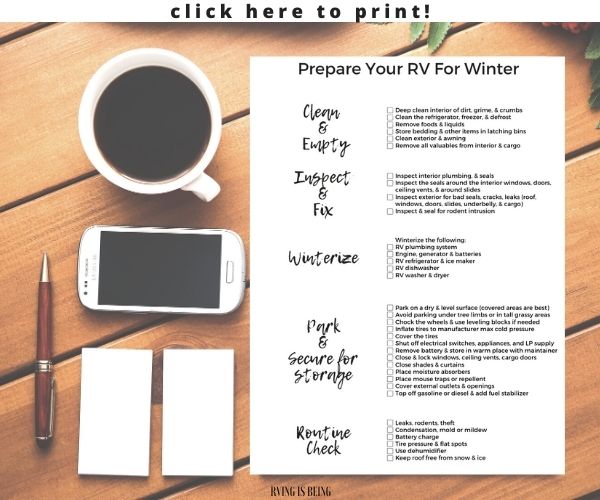
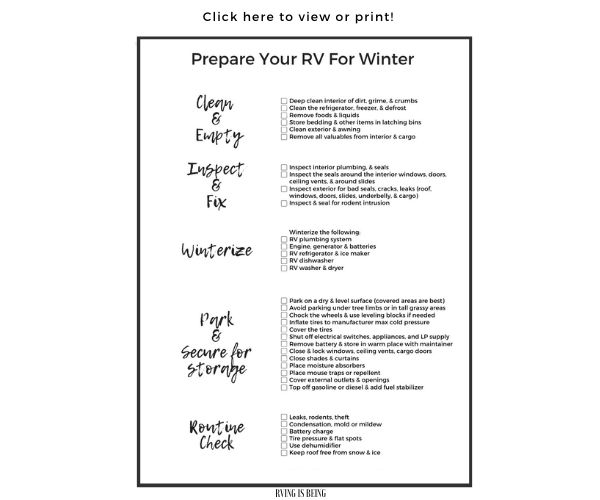
Take a look at the checklist below with steps to prepare your RV for winter storage. Keep in mind, RV components differ, as do storage locations and the winterization process. For these reasons, always refer back to your owner’s manual for proper care and winterization steps.
Is Your RV Ready For Winter? | Tips For Winter Storage
Clean and Empty
Before anything else, do a thorough deep clean, inside and out, removing valuables, cleaning dust, grime, and any crumbs left behind which could attract mice.
Doing so also allows you to inspect the interior for any leaks, cracks, or seals that need to be addressed before winter. Besides, if you’re going to make any minor fixes (resealing, patching, etc.), you’ll want the surfaces squeaky clean so that your seal job isn’t trying to cling to dirt and grime.

Just like we did in Spring Cleaning | Interior Edition, you’ll want to use an RV safe cleaner. (Refer back to your owner’s manual for this.) Don’t forget to clean inside cabinets, under the sinks, underneath couches and chairs, and in the storage closets. Do the same for the outside cargo area. While cleaning, it’s a good time to inspect things as well.
A few RV-friendly cleaning items we use are:
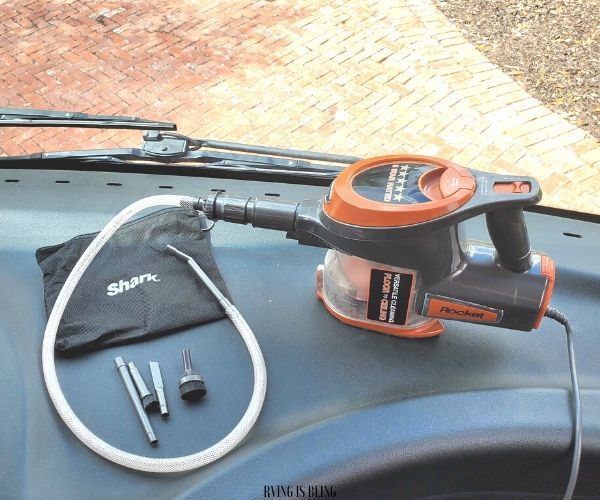
- with the — This lightweight and compact vacuum is perfect for the RV. Likewise, the detail kit is great for getting into the tiniest spaces.
- RV-safe anti-bacterial multi-surface cleaner
- RV kitchen & bath cleaner
- RV toilet bowl cleaner
- UV protectant wipes
- Broom & dust pan
- Swiffer Sweeper/Mop
- Hanging moisture absorber
Remember to clean and unpack:
- Motorhome: driver’s area and dash
- Kitchen: countertops, sink, under the sink, cabinets, pantry, oven and range, microwave, refrigerator, freezer, dinette/booth, and trash can
- Living area: seating, under seating, overhead cabinets, wall fixtures, decor, ottomans, and storage
- Bathroom: countertop, medicine cabinet, sink, under the sink, toilet, shower, and trash
- Bedroom & Bunkhouse: dresser drawers, overhead storage, closet, under bed storage, washer & dryer, and bedding
- Exterior: cargo area and outdoor kitchen
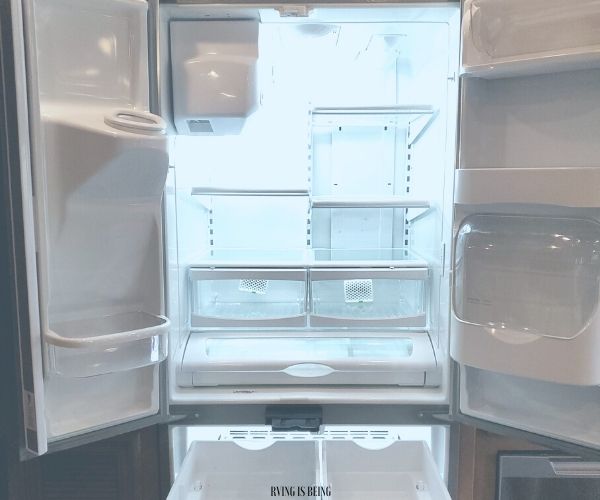
Open up the refrigerator and freezer. Remove all food items, empty the ice maker, and defrost the freezer.

Strip the bedding and linens. If you plan on keeping the bedding and linens in the RV throughout winter storage, it’s best to fold items and store in latching bins to prevent dust accumulation and/or mouse droppings.
Remove all food items and liquids from the camper. Also remove any personal items, electronics, toiletries and camping gear. If you wish to leave some non-freezable and durable items in the unit, store them in .
Moving to the exterior; thoroughly wash the rig and awning. Also, make sure the awning is dry before storing to prevent mold and mildew.
Remember to take out all valuables inside and out in the cargo area!
With the unfortunate rise in RV break-ins and theft, consider removing high dollar items (tool kits, surge protectors or EMS, grills, coolers, TVs, generators, batteries, etc.).
A good rule of thumb is to remove anything that would attract bugs, rodents, or thieves!
Inspect, Fix, & Service
Now’s the time to inspect, seal, and address any potential issues. Before storing, thoroughly inspect the interior and exterior of the rig. Examine the plumbing under the sinks and seals around the sink, toilet, and shower.
Additionally, check the seals around the doors, windows, vents, and around the slides, both inside and out.
Check the roof for any scuffs, cracks, bad seals or leaks. Pay special attention around the air conditioners, vents, antennas, or dishes. any potential mouse entry points along the underbelly and sides of the RV.
After you’re done cleaning, inspecting, and fixing– it’s time to winterize. Remember, after your unit is winterized you CANNOT run the water. It’s important to do any cleaning before this process!
Winterize
Winterizing your RV means to prepare it for the cold winter weather. The exterior and interior components must take on harsh winter conditions and, depending on your location, could also entail long periods of freezing temperatures and heavy snowfall. Just like an ice cube, the plumbing, if not protected, could freeze, expand, and even crack– breaking lines. It’s extremely important that if your rig is in these types of temperatures, it gets winterized.
First things first, always read your RV owner’s manual for unit-specific winterizing and preparation guidelines for plumbing, engine, generator, battery, and other appliances. Most manuals may instruct similar steps to the winterization process (below) for plumbing. However systems, features, and methods may be different depending on your camper make and model.
Notice: Never use automotive antifreeze in your fresh water system. Automotive antifreeze is toxic and not for use in potable or drinkable water systems. Always use RV/Marine safe antifreeze.
- Start by draining and flushing the black and gray water holding tanks. (Start with black then gray.) Do so while you’re at the last campground of the season or locate a campground or gas station near you with an RV dump station. Flush and drain them thoroughly. It’s very important to not leave any waste water sitting in the tanks over the winter.
- Next you’ll want to drain all other water from the rig. Drain the fresh water tank by opening the tank drain valve. Then, open every faucet (hot and cold), flush the toilet, and the outside shower to get the remaining water out of the plumbing.
- Turn off the water heater or hydronic heating system and let it cool down. Close the valves to the water heater and open the bypass valve. This is usually at the back side of the water heater. If your RV does not come equipped with a , you or a local RV service can install one. Remove the drain plug at the bottom of the tank on the exterior of the coach. You can open the pressure relief valve so it empties faster.
- You’ll also want to remove or bypass any drinking or refrigerator water filters before introducing antifreeze.
- Some RV manufacturers instruct to use the compressed air method– blowing all the excess water out of the lines. If instructed to do so, you may need a special adapter known as a . This plug allows compressed air to be used through the City Water Connection. With the blowout plug threaded to the city water inlet and all faucets open, attach an air compressor to blow the remaining water out of the lines. Be sure to not exceed 50 PSI or stated in your owner’s manual. Then close all the faucets and drains before pumping antifreeze through.
- Next, if your unit has an intake draw tube (often installed on newer motor coaches) place it into a jug of RV antifreeze. For older RVs, a can be installed.
- Turn the water pump on. This will start pumping antifreeze throughout the plumbing system.
- From the closest faucet to furthest, open each valve (both hot and cold) until the pink antifreeze appears. Don’t forget the toilet and shower. Make sure to also open the outdoor shower valve until the water runs pink.
Refer back to your owner’s manual for winterizing any drinking water dispensers, dishwashers, washing machines, and ice makers.
- Then turn off the water pump and close all faucets.
- If you have a macerator, turn it on to empty the black and gray holding tanks allowing it and the hose to fill with antifreeze. If you do not have a macerator, empty the black and gray by the sewer hose to get any excess water out of the tanks.
- Pour some additional antifreeze down the sink trap, toilet, and shower drain.
Park & Secure for Storage
Park on a dry and level surface. After all, inside a storage building or under a covered area is best, but not all RVers can do so. If not doable, park on a concrete pad or dry and level gravel area. Avoid parking under tree limbs or tall, grassy areas where the unit is more susceptible to falling branches and critters.
Inflate the tires to the manufacturer max cold pressure. Chock the tires and level. Make sure any leveling blocks under the tires are larger than the surface footprint of the tire. For example, the entire bottom of the tire should be contacting the blocks– with no overhang. Consider covering them from UV rays and brutal weather.
In preparation for storage, if you have portable propane tanks, remove them. If fixed, locate the shutoff valve to the tank and turn it off– ensuring it is completely shut off.
Make sure all electrical switches and appliances are off. Then, flip off the battery cutoff switch. This cuts off the electrical power between your batteries and the RV, preventing it from excessive drain. Again, if you can remove and store the batteries in a warm location, do so.
Close the window shades and curtains to avoid sun exposure and also prevent thieves from scouting out your rig.
Be sure all windows, doors, and vents are locked and securely closed.
exterior vents to prevent insects and rodents from entering. Place insect and rodent repellent throughout the unit.
Also, because ventilation is limited during storage, condensation can become an issue. In this case, place moisture absorbers throughout the rig.

If you wish to put a storage cover on your RV, make sure that it is well ventilated to help prevent mold and mildew. Also, keep in mind, sometimes covers do more harm than good– especially in windy areas where it can smack against and rub the exterior. In the long run, if you do decide on covering your unit, make sure to use a quality, breathable cover, specifically fitted for your type of RV.
Routine Check
Try to routinely check on your RV:
- Check the interior of the RV for condensation build up, leaks, signs of rodents, or theft.
- Check the batteries and charge if needed.
- Check the tires and tire pressure.
- Replace moisture absorber bags.
- Keep the roof branch, snow, and ice free– inspecting it especially after heavy snowfall.
For you cold-weather travelers out there, check out: Cold Weather Accessories You’ll Love for RV Camping!
RVING IS BEING prepared for the cold weather ahead!
Related posts
Today's pick
Hot topics
Disclosure: This website contains affiliate links, meaning we will get a commission if you decide to make a purchase through the links, at no additional cost to you. Additionally, this website is an Amazon Associate. As an Amazon Associate, the owner of this website earns a commission as a result of certain qualifying purchases. CERTAIN CONTENT THAT APPEARS ON THE SITE TO WHICH THIS SITE LINKS ARE AFFILIATE LINKS. THIS LINKED CONTENT IS PROVIDED “AS IS” AND IS SUBJECT TO CHANGE OR REMOVAL ANY TIME. Please read this Site’s disclosure and privacy policy & terms for more information.
Categories
- Children & Family (15)
- Cookout Gear & Accessories (6)
- Food (2)
- Guide (37)
- Health (5)
- Holidays (10)
- List (10)
- Maintenance & Repair (10)
- Printables (4)
- Products & Accessories (40)
- Quote (3)
- RV & Campsite Setup (23)
- RVING (78)
- Shop Page (36)
- Storage & Organization (2)
- Tech (4)
- Travel (22)


