This post contains affiliate links, meaning I get a commission if you decide to make a purchase through my links, at no extra cost to you. Please read my disclosure and privacy & terms for more info.
RVshare makes renting an RV unit easy!
See exactly how to book a rental with this step-by-step guide.
To learn more about RVshare, see The Rundown on Renting an RV with RVshare.
You may like: New to RVing? Why You Should Rent First Before Owning
How to Book a Rental on RVshare
A Step-By-Step Guide
What You Need:
- Valid ID or driver’s license – if driving or towing a unit
- To be at least 25 years old
- Smart phone (You’ll need to take a selfie to verify your ID)
- Some moolah… Plan on the nightly rate plus RVshare fees associated with the rental
What To Do:
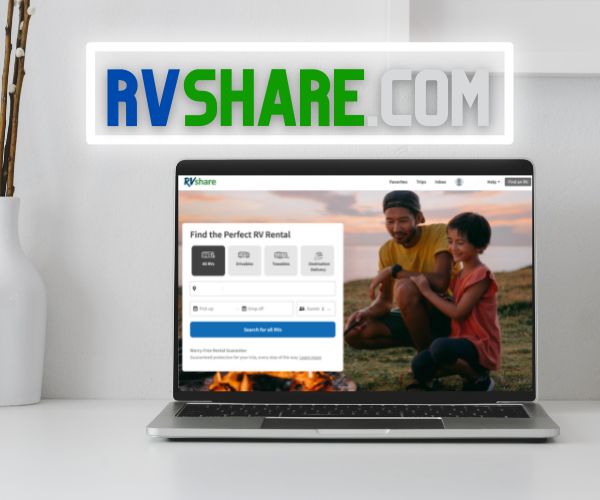
1.Head to RVShare.com.
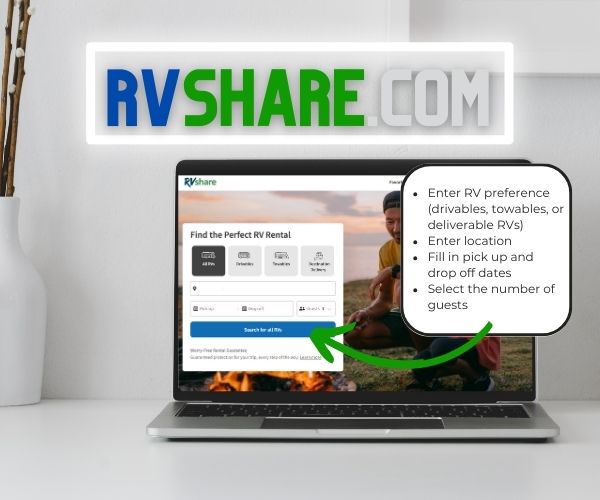
To get started, enter some basic information into the search criteria such as:
- What type of RV you’d like to rent (drivables, towables, or deliverable RVs)
- The city where you’d like to rent from (or delivered to)
- The dates you wish to use the camper
- The number of guests
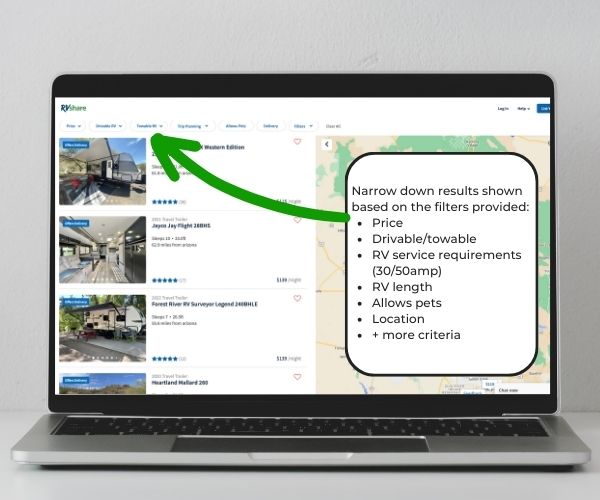
2.From the results listed, narrow down your RV selection through refining: the rental price, type of unit (Class A, B, or C, 5th wheel, travel trailer, toy hauler, or popup), power and water services (30/50 amp, onboard generator, hot/cold water supply), and RV length.
Likewise, you can adjust the list of amenities and features you prefer like: TVs, rear cameras, showers, stoves and more. In addition to rental criteria, some even allow pets and smoking, where others offer delivery to your destination.
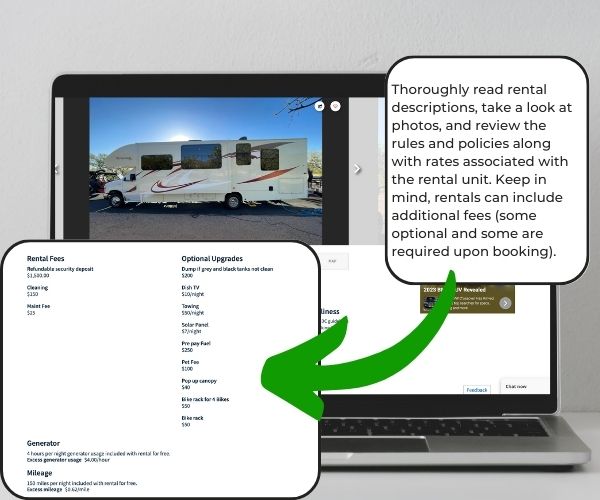
3. Take a further look into listing descriptions, photos, reviews, policies, and rates. Keep in mind, aside from the initial nightly rate shown, out of pocket charges will also include taxes and fees (service fee and rental insurance fees), and can be subject to additional costs like: cleaning fees, excess mileage fees, pet fees, generator usage fees, propane refill fees, and late fees.
On top of that, prepare for the hunk of money set aside for the security deposit used to cover damages that may occur. This generally shows as a pending transaction on your credit card and is held until the trip has been completed. An alternative option to this, is the Security Deposit Waiver, where, if offered by the owner, renters pay a non-refundable fee of $79. This provides coverage up to $1,500 for eligible covered damages toward the Insurance and Protection deductible but cannot be used towards any trip overages or fees. (If offered, this gives renters a more affordable option, avoiding a large hold on their credit card refunded at the owner’s discretion.)
It’s very important to fully read through the rental policies and fees associated with its use before requesting to book!
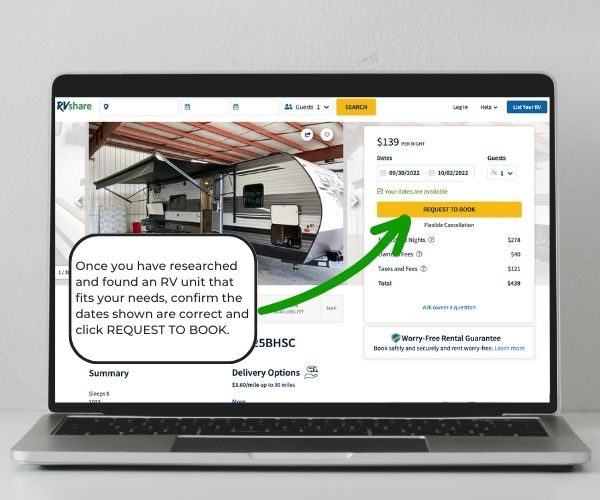
4.Once you have researched potential RVs and found a unit that perfectly fits your needs, confirm the dates shown are correct and click REQUEST TO BOOK. This will send a booking request with your details (completed in step #5) to the owner giving them 24 hours to respond.
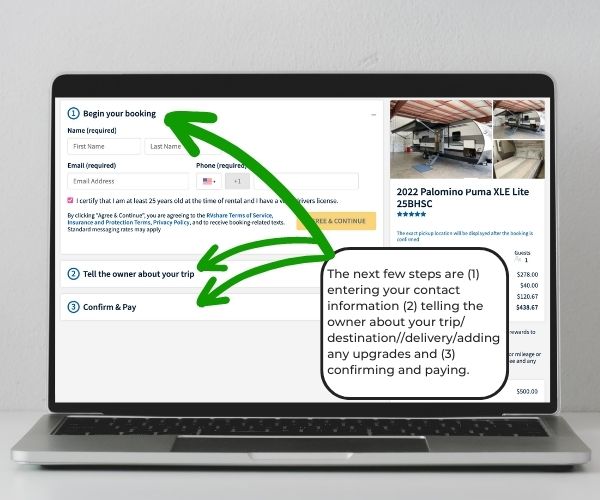
5.The next few steps are:
(1) Entering your contact information.
(2) Telling the owner about your trip/destination/delivery/and adding any upgrades to the trip.
(3) Confirming and paying. Be sure to take note of the cancellation policy. You will not be charged at this point– only once the owner accepts your request.
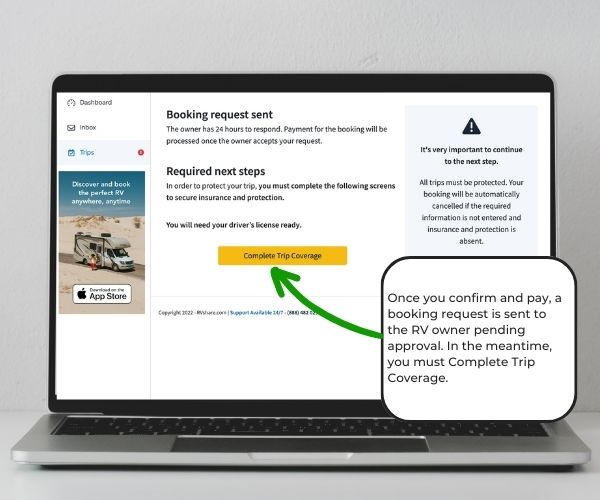
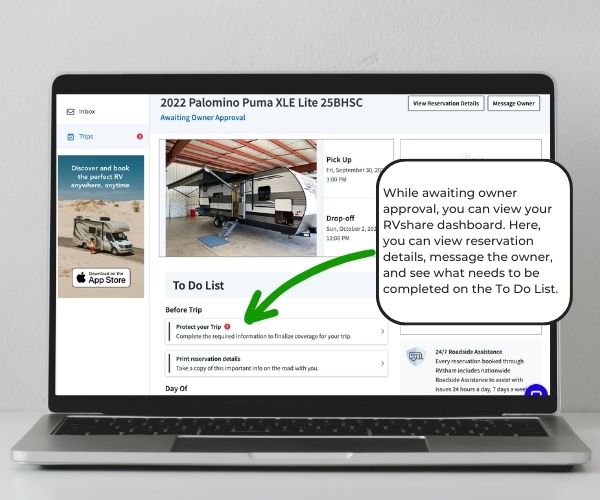
6.Once step 3 “Confirm & Pay” is completed, a booking request is sent to the RV owner pending approval. While waiting for confirmation from the owner, you can complete the required next steps.
7.You can manage the rental and view details from the RVshare Dashboard, listed on the left menu. Its user-friendly interface displays a summary of your reservation details while indicating what steps to complete next. From here, users can message the owner with any questions, print reservation details, access helpful FAQs, find out what to do when the rental is over, and see how to contact RVshare should further assistance be needed.
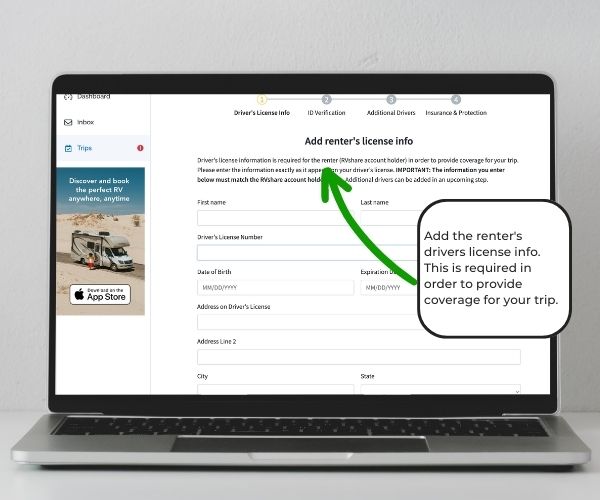
8.In order to continue with the booking and gain coverage for the trip, you must first verify who you say you are by adding license information. In the following fields, add your name, driver’s license number, birthdate, and address.
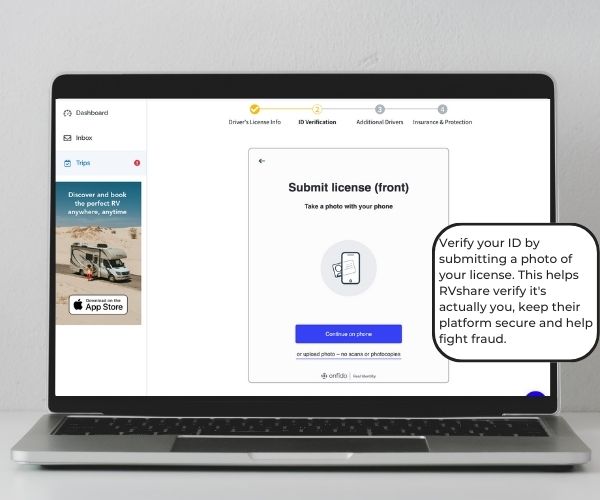
9.RVshare incorporates an effective vetting process to help prevent fraud and keep their platform secure. Until your ID is verified, you will not be able to complete the booking process or view the location of the RV. To prove the information submitted matches your license, you must submit a current photo of your license. To continue this step on a mobile device, RVshare will send a secure link to your phone.
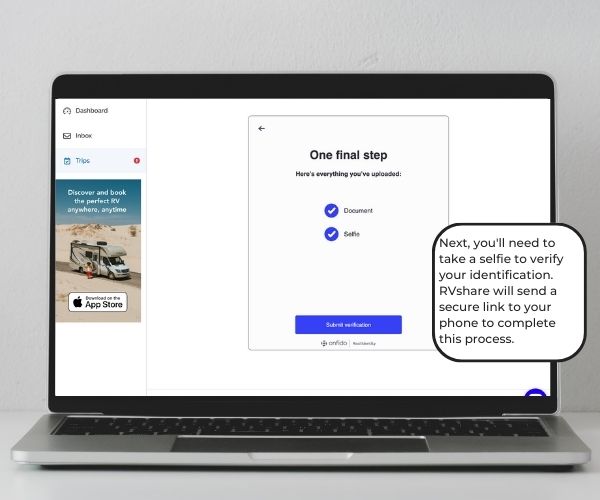
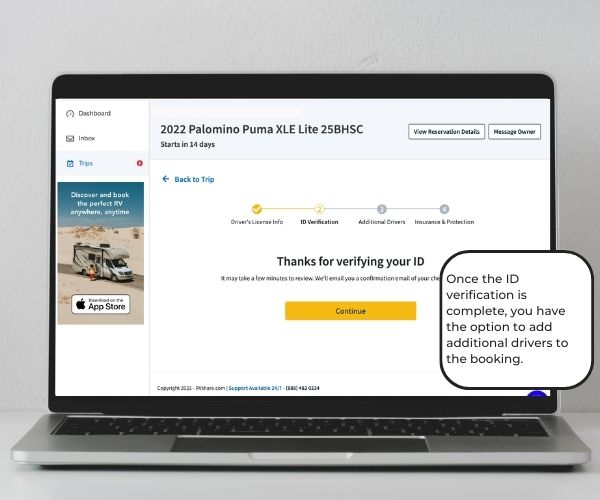
10.Next, you must take a current selfie to verify your identification. Again, RVshare will send a secure link to your phone to complete this task.
11.Once the ID verification process is complete, you’ll have the option to add additional drivers to the rental reservation should anyone else be driving or towing the unit. If so, they will repeat the ID verification process, like above.
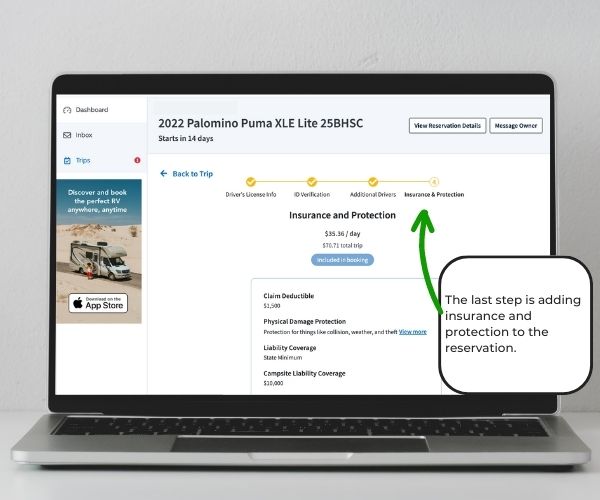
12.Finally, add insurance and protection to the rental. Every rental through RVshare is required to secure RVshare Insurance and Protection in case anything happens during the trip. An Essential Package will automatically be included on eligible RVs in the rental quote; however, renters will be able to choose a different package and upgrade if they wish. The cost of the RVshare Protection Plan is based on multiple factors including the stated value of the RV, type, and length.
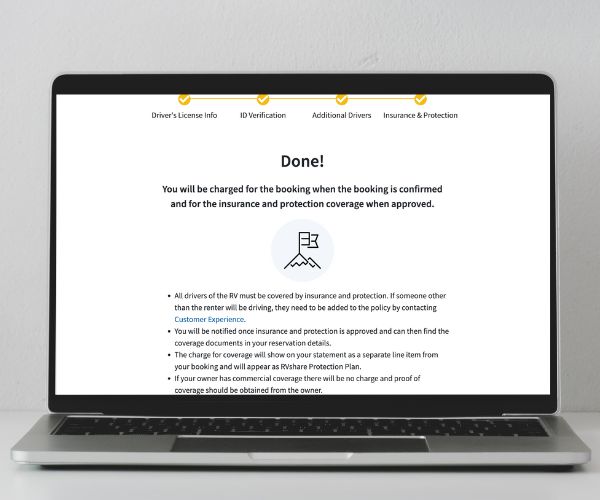
13.Once finished, all you need to do is await owner approval (if not already accepted).
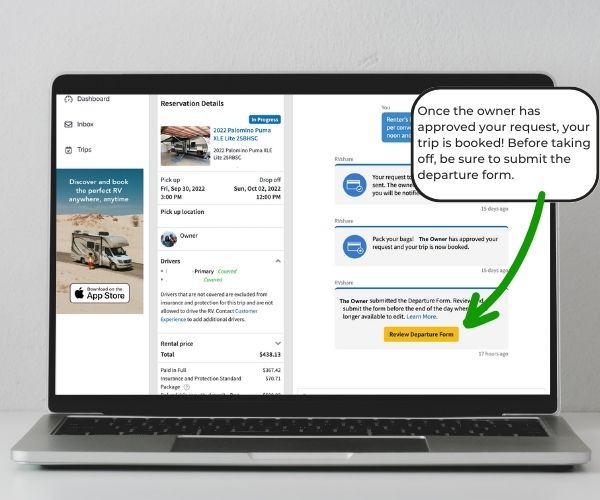
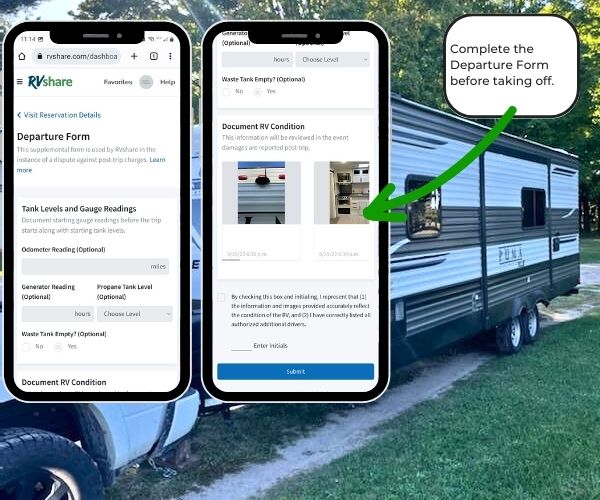
14.Once approved, your trip is now booked. The dashboard will include reservation details for your upcoming trip. A Departure Form will be submitted by the owner on the reservation start date documenting the pre-trip condition of the RV. You must digitally sign and submit the form before the end of the day on the reservation start date. A great time to do so is when picking up the RV unit at orientation so that you can verify the information submitted.
15.The pick up location details are now available where you’ll schedule to meet the owner, do a walk-through, and learn how to use it.
Our process was very thorough as the owner went over the hookup procedures, deploying and retracting slide-outs, leveling the unit, emptying tanks, and even helped with hitching it up. When doing a walk through, we were shown where supplies were (TP, linens, coffee maker, toaster, pots and pans, etc.), how to turn on the propane, work the TVs and cable hookup, and how to properly use the onboard facilities.
Before hitting the road, make sure to complete the Departure Form. This will note any existing damage, fuel levels, tank levels, odometer reading, etc.
Even if you are an experienced camper, it’s very important to thoroughly go over the RV unit.
During orientation, you should go over the following:
- If motorhome, how to start up, use the airbrake, and GPS.
- If trailer, how to safely hitch and unhitch to your vehicle.
- How to lock and unlock the RV unit.
- How to level onsite.
- How to operate the generator.
- How to hook up to campsite amenities (electric, water, & sewer hookups).
- How to read the tank levels.
- How to empty tanks.
- How to deploy and retract slide outs.
- How to use thermostat, RV appliances, TV and cable hookup.
- How to use the facilities, the water pump switch, and hot water heater for hot showers.
- How to extend and retract the awning.
- Where the propane tanks are located and how to turn on.
- How to refuel the RV and what type of fuel.
- How to prepare the interior and exterior for travel. (Securing appliances and items in cabinets, locking refrigerator, secure pocket doors, lower satellite, slides in, steps up, brake controls, etc.)
Lastly, get a rundown of returning the RV to the owner once your trip is over. Go over when you will be returning it and where to park it. Make sure to return the keys, hitch, sway bars, etc. back to the owner.
You may like:
RV Arrival and Set Up Checklist
RV Tear Down and Departure Checklist
How to Dump Your… Dump! Step-by-Step Instructions PLUS Terms, Tips & Tricks for a Smooth Process
REMEMBER
- Bring your driver’s license, proof of coverage and reservation details (found under the “Reservation Details” section of the RVshare dashboard menu).
- Set aside enough time with the owner for a detailed walk through.
- Make sure you know how to operate the RV unit. Although you may have used a camper before, units can differ between manufacturers. Have questions? Ask!
- Always communicate and submit payment directly through the RVshare site. Funds exchanged outside the platform will not be guaranteed by RVshare.
RVING IS BEING adventurous